
Tips for History Taking and Physical Examination
%20(50%20%C3%97%2050%20px)%20(150%20%C3%97%2040%20px)%20(1500%20%C3%97%20400%20px)%20(6)%20-%20Edited.png?width=250&height=88&name=Premium%20Student%2c%20Free%20Student%20(1000%20%C3%97%2050%20px)%20(50%20%C3%97%2050%20px)%20(150%20%C3%97%2040%20px)%20(1500%20%C3%97%20400%20px)%20(6)%20-%20Edited.png)
Click Through Method:
History Taking questions are categorized according to classic textbook methods based on international gold standards and follows:
Patient information
Chief Complaint
History of Present Illness
Past Medical History
Family History
Social History
Review of Systems.
Navigate through each section step by step, selecting the most relevant questions based on your patient's chief complaint. Avoid selecting all questions, as only the pertinent ones apply to your patient’s condition. Choosing all the questions will result in a ZERO knowledge score.
Keyword Search Method:
When searching in the History Taking section, use keywords instead of complete sentences to find what you're looking for. The same applies to Special Examinations—use specific test names or relevant keywords if known.
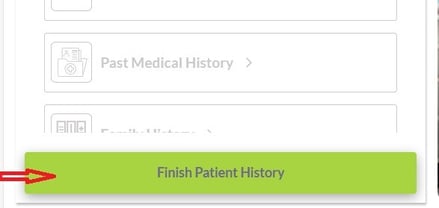
Please save your History Taking by clicking on Finish Patient History before closing the browser window. This saves your progress for when you return to the case.
Please make sure to save your physical examination BEFORE moving on to the next step.
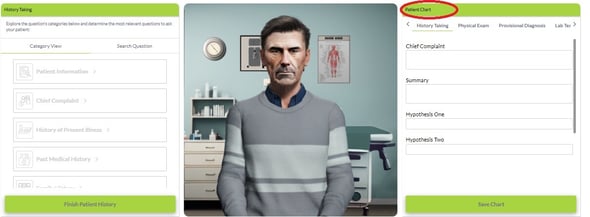
Once you have completed the questions during the History Taking, please document your findings in the Patient Chart (if required). This allows students and faculty to see the progress in each case and their decision-making skills. Remember to use the patient chart to document your findings throughout the patient care continuum.
During the Physical Examination, users will notice that some options are greyed-out. Please adjust your patient’s position using the tools in the image below to activate the greyed-out options.
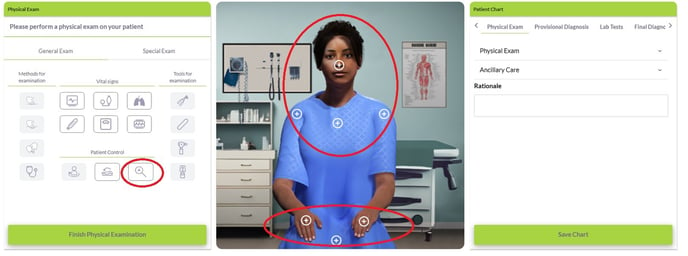
Use the Zoom button (shown above) to see specific areas of the patient, then click on the desired site of the patient to examine. This is identified on the screen with (+).
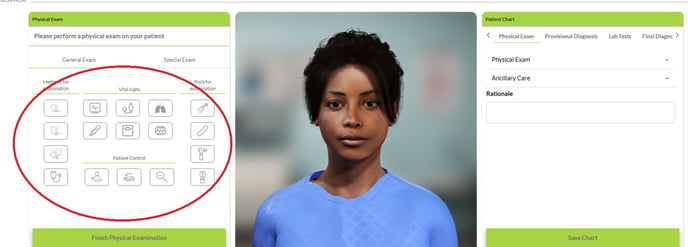
This will activate additional tools (as seen in the second image below). Users will hold down the mouse for some physical examinations, such as auscultation, to complete the process.
For tutorials on navigating CyberPatient cases at every level, refer to our Student TrainingHub or Institutional & Faculty TrainingHub
Student Training Videos


